Showing posts with label Storybook. Show all posts

Thursday, February 9, 2012

#23 Mother's Day Layout


Good morning! I am excited to share with you my all time favorite layout I've made so far (well one of them lol!).  I used my Cricut E2 along with my lovely Cameo to create this masterpiece! The 3d ruffled flowers are a file from the Silhouette store I cut them around 3 inches each and sprayed them all with glimmer mist, ruffled them up and added a brad to the centers, the tiny flowers on the bottom right are also from the Silhouette store these are more like quilled flowers. Here's a list of the Cricut carts I used:

Title-Mother's Day 2010
Green flourish- Home Accents
White Flourishes- Storybook
Yellow Scallop Square- Just Because Cards

I was happy to be able to combine my Cricut and my Cameo for a fun little twist lol! I am so hooked on my Cameo at the moment that I sometimes forget that I already have 100,000's of images on all my carts!

*****Do you own a Silhouette Cameo or SD? If so be sure to come play along in the current Cameo Creations Challenge right HERE for a chance to win $15 in SVG files!!!!

Tuesday, January 3, 2012

#3 Balloon & Wine Festival Layout

Hi everyone! Here's a layout I made for my 2010 scrapbook I am really trying hard to finish it soon before this baby comes in April! I have 20 layouts down and 20 more to go! I feel like a complete scrapbook album is 40 layouts total LOL!

I used my Silhouette Cameo for the doily shape, the hot air balloon, circles, the font is a font from my computer that I cut at 1/2 an inch! The flourish shape is from my Storybook Cricut cartridge. I allded plenty of pink bling and Stickles. All papers are from DCWV Lace & Linen stack, it's so pretty!

Here's my bling hot air balloon.

I am entering my layout in this sketch challenge http://sketchabilities.blogspot.com/

Friday, August 5, 2011

#178 Tent Card and I'm a Guest Designer!!!

(Front of Card)
Hi everyone!!! I am so super excited to be a Guest Designer today for the wonderful talented Erika from Crafty Sprouts (formerly Cricut Love). In case you haven't seen her new blog changes be sure to check it out HERE she has a brand new blog design and a fabulous new blog name I love all the new changes!!!

Erika wanted her Guest Designers to make a tent card, and of course I had to say yes!! I was totally up for this challenge especially since I never made one before, I was so happy to think outside the box!  I did a search for "Tent Cards" and stumbled across this fabulous blog post from Magnolia stamps HERE and they had a step by step tutorial which was very easy to follow!

(Side View)
I just love how this card folds completely flat and measures 6x6 inches then, when you see the side you see how cool it is that it stands up on its own!

Here's another view of how I assembled the top, I colored this stamp called Sasha from TGFS called Creepin Crew, I actually stamped her on tan cardstock and colored her with Bic markers and added Stickles to her bracelet and boots. I also added a bow, and the silver ring you see her actually makes her dangle. I got the rings in a large package from Michael's jewelry section for about $2..... I felt like I was cheating on the Scrapbooking section LOL!

Here's another shot I just had to show you! Its a closeup of my famous tiny paper roses, yes they are so freaking tiny and take about 10 minutes to make but I love them! I used a 1 inch 6 petal flower punch to create these. The sentiment is Scrappy Moms stamps, and the oval shape and scallop oval are from the Storybook cart. 

Ok so I know this card looks intimidating but it was extremely easy!!! If you would like to join in the fun and create a Tent card you can enter the challenge at  Crafty Sprouts Blog !!! 

The sponsor for this challenge is PKS (wide eyed kids face assortment) also everyone that enters in the challenges until August 26 will be entered to win a Scrap N Easel! Erika is giving away a $10 Gift certificate to Market Street stamps for everyone that comments on Erika's blog and the Guest designers blogs this week!

These are so amazing prizes up for grabs and all you have to do is enter the Tent Card challenge HERE!!

Thank you so much Erika for letting me create something completely different and for getting me out of my card rut LOL! Love these tent cards!!!


Saturday, July 30, 2011

#174-177 Butterfly Birthday Blog Hop

Blog Hop

Hi everyone welcome to my Butterfly Birthday Blog Hop hosted by me in honor of my 28th Birthday which is on Sunday July 31st! I thought it would be a good idea to make a butterfly themed birthday party in real life and a virtual b-day party! I made all of the decorations for my party at my house which is also today!!  I asked everyone on my hop to make anything butterfly and birthday themed and some of us will be posting on both days (Sat/Sun) so be sure to come check out the stops again on Sunday. You will have until midnight PST on August 1st to complete the hop, enjoy!

Welcome to my party!!! Here's a sign that I will be hanging on my front door I got the font from designer's Calendar, and sign with butterfies from Lacey Labels. It measures 6x12 inches.
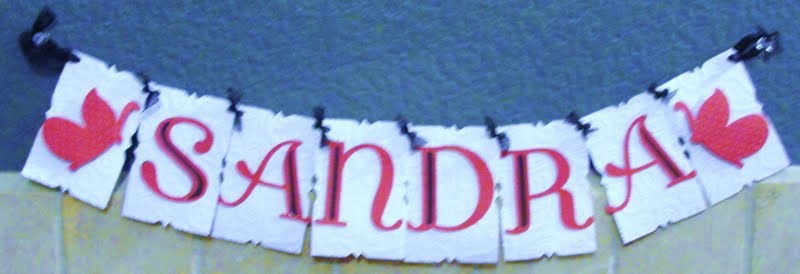
Here's a banner I made for the living room, the shape and butterflies are from Storybook cart, and the font is from Lovely Floral.

Here you can see my black lace ribbon and I embossed with my Paisley and Swiss Dots folder in my Cuttlebug.

\
Ok now you are in my kitchen who's hungry!?! LOL! I made some pop up butterflies for my cabinet doors I cut them from Hannah Montana (Love that cart!)

Close up of the pretty butterfly!

Ok can you guess what these are for.....? I am going to decorate my own cake with paper butterflies! these are also from Hannah Montana!

I purchased this pre-made cake from the grocery store, it's actually really huge! Chocolate and strawberries yum!! I made sure they wrote the sentiment in hot pink to match my theme.

I just grabbed the butterflies and pressed them into the cake and they actually stayed there. My party isn't till this evening so I'll have to see if they will stay in place all day.

Here's a close up of my Cricut butterflies!!


Blog Candy!!!! I am giving away a $20 Gift card to Joann's to use In store or Online at Joanns.com and also a Quirky Quotes stamp set sponsored by Scrappy Moms Stamps!! All you have to do is be a follower and leave a comment here and all blogs and also on my 365 Days of Cricut Facebook Fan Page!! I will select a random winner on August 1st and post it on my Facebook fan page!! Good Luck!


Here's the master hop list incase you get lost:

2. Joanna http://scrap-making.blogspot.com/  NEXT STOP

End Hop on 365 Days Of Cricut FB Fan Page:
Thank you to all of the amazing designers who are joining my birthday celebrating and thank you sto Abby for making this beautiful hop button, you are so talented girl!!
NEXT STOP is my sis JOANNA

Friday, May 6, 2011

#117 Father's Day Layout

 ***Click HERE for the Cinco de Mayo Blog Hop***

Today is Friday you know what that means......time for a new challenge at Flaunt It Friday's. This week's challenge we are flaunting our WRAP IT Up cartridge and the cut choice this week is the Castle on Page 24. If you do not own Wrap It Up then you can use any castle from any cart.


I cut the castle with all layers on gray paper, then I placed eached piece in my Cuttlebug and embossed using the Tim Holtz Bricked embossing folder. I then inked it up real good with Black Soot Distress Ink and sprayed "Slate" Glimmer Mist over the castle and added pop dots for each layer. The font is from Storybook and also Tim Holtz die Typeset. This paper is from that Fancy stack from DCWV called Once Upon A Time. My layout is about spending Father's Day 2010 at Medieval Times.


I recently bought this mesh looking mask and sprayed the area with Glimmer mist.

Here you can see the castle layers.

For each photo I sanded it, distressed in my Zutter Distrezz it all, inked up the edges and added copper brads to the corners.

There's my castle! I just have to say that I LOVE Tim Holtz texture fades AKA embossing folders!! I think they emboss much deeper impressions then the Cuttlebug folders.! I stamped the small sentiment on the flag with KinderStampO stamps.


Please be sure to enter your castle project at Flaunt It Friday's for a chance to win a $20 gift certificate from our sponsor Scrapbuck!!

Thursday, April 28, 2011

#109 Mother's Day Card

Hi everyone! Here's a card I made for a custom order. The bird is from Lyrical Letters, marquee shape... Storybook, and the cloud is from Going Places. I embossed the background with my Cuttlebug and added faux stitching and stamped the flower with PKS.

Sunday, August 29, 2010

#120 Cathedral Layout ( The Paper Player's)


For the challenge at The Paper Player's the theme is simple...anything goes!! Here is a layout of a Cathedral that I saw while on vactaion I wanted the layout to be really old fashioned. The chapel/church and the crosses are from Tie the Knot, the Cathedral title is from Storybook. I added three pieces of patterened paper, a gold/greenish color ribbon behind the title and rose border stickers. I embossed the church and the 3 crossed with my cuttlebug.

Wednesday, July 14, 2010

#83 Forever card (BBTB2 Challenge)

For this weeks challenge at BBTB2 they are using the owl from SB. I made a love style card the owl's are from SB the circle and heart are from Plantin Schoolbook and the scallop border is from Accent Essentials. I used my Cuttlebug to emboss the swirls and the dots on the owls. I did some distressing with my Fired Brick distress ink and stamp the sentiment and added some stickles on the sentiment,  I also added some black ribbon and a ribbon bow.

Monday, June 14, 2010

#63 Pool Time 2 pg LO

Pg. 1Pg.2


Here's a 2 pg LO I created about the 5 pools at our hotel. The title is from SB I distressed with white chalk ink. The boy, float, and 3 beach balls are EPDDU, the two palm trees are SYI and the marquee is SB. I did some journaling and added a border of fish stamps. I put stickles on the balls and trees. I put 2 different strips of ribbon across both pages and final touch I added Prima flowers and buttons.

Saturday, June 12, 2010

#61 Husband's B-day card ADULTS ONLY LOL!


Inside of card.

     Outside of card. OOps didn't take pic till after  the party, kinda dirty.

Envelope and liner.


The main reason I bought TTK was for that corset I had it all planned out, I know I'm a dork LOL! Birthday Boy is from SB the card, card frame, envelop and Liner are all from WC I think it was the wedding invite cut. I stamped the sentiment, stickled the corset and sprayed glimmer mist all over the card. I felt it was too plain but it is a challenge making manly cards, he loved it so much and he was showing it off to all his friends at his party LOL I'm glad he liked it.

Friday, June 11, 2010

#60 Pretty Statues LO (wee Memories challenge)

This is my favorite punch ever!

I was excited when I was making this LO because I was able to fit 7 photos!!! I like adding a lot of pics to my LO's because I love taking pictures. I chose to use pretty paper to go along with my  pretty statues title and of course I had to use a pretty lace punch. The butterfly is from SB, flower DC, and title is GF. i added some bling to the butterfly and the flower. "Statues" letters are stickers. This LO was for my 1st ever wee Memories challenge, it was to use a punch.

Monday, June 7, 2010

#55 Fancy Birthday Cake LO


Red and black stickles and rhinestones were added to my cake.


I was going for a really fancy theme here so I made a beautiful cake from SIP I added stickles and smeared it on with my fingers. I added rhinestones only to the middle. For the title I cut it from SB then i embossed the red background paper. The swirl on top is from TTK and I also added stickles. I got sheet music and I crumbled and used distress ink also a lacy border punch. I did my journaling on the sheet music to make it look like a song.

#54 Cliff Divers LO


I used 3 different color inks and stickles to color the fish.


For this manly LO I cut fish from Pagoda, shaped background frame from SB, title and circle from AMU. The original color of the fish was the same orange paper for the scallop borders, I did a major face lift on the fish LOL!. I added ribbon across the middle with different greens buttons. The scallop borders were cut using my shaped scissors.

Wednesday, June 2, 2010

#53 Mexican Fiesta LO (3rd Challenge w/Joanna)

This was the 3 rd challenge with my sister Joanna  http://scrap-making.blogspot.com/  This time I choose, I choose this dress from Paisley I thought it was so cute and I was going to do something completely different with this cut. I wanted to make a paper doll with this dress but I didn't think it looked right so I did this instead. I'm pretty happy with the outcome. I CB'd the dress and did some distressing and added gold and green stickles to it since I didn't feel like cutting a shadow...yep I get lazy with my scrapbooking sometimes! I stickled the yellow Prima flower on the left side.  "Party Time" is from Stamping I also added gold stickles to the entire outline. The border flag thing on the bottom is from Give a Hoot, I added some red bling to the tops of the flags. "Fiesta" was cut from SB on white paper I drew the outline with a red pen and colored the inside with a yellow marker. The red patterened paper is from the Citrus stack from Joann's. I  added a strip of red lace ribbon to the middle and used my corner punch for the fiesta flyer that I got when I bought my ticket to this show.

#52 Stone Island LO


I wanted this LO to look fresh, fresh like the water. I cut the swirly's and the frame from SB the font is PS. On the frame I added silver stickles to a darker blue paper. The glittery blue  patterened paper is from the Spring Glitter Stack from Joann's.

Wednesday, May 26, 2010

#44 Art Layout


These pics were actually murals at a hotel in Mexico. For the black flowers I welded them together to make a border, it's from SB. The white flowers are from Sentimentals, title HM. I added a white ribbon to the left side of pic and also embossed the black flowers with the cuttlebug.

Thursday, May 20, 2010

#39 Hearts Anniversary card


I had so much fun making this card especially since I was able to use a lot of my supplies, including my new Tim Holtz stamps!  I cut the oval from SB and the hearts from AA, pretty simple and easy cuts which I totally blinged out!

Monday, May 17, 2010

#30 Wizard of Oz LO


This LO was so much fun making I Love paper dolls! Toto was from PP, Tin man's oil can was from EPPD, Lion, Scarecrow, Dorothy, and Emerald City were from PDDU, Shoes FY, brick road GP, sweet is from AMU, San fran is from SB. I hope that helps. It took ubout 6 hours to create...my longest LO ever!

Sunday, January 24, 2010

#13 Small Dogs Big Heart Layout


My son Aidan was only 3 weeks here and my 2 small dogs were so careful, curious and protective around my baby.  They followed me everywhere whenever I held my baby...I guess they wanted to make sure I was taking good care of him. I felt like they were little guardian angels.

#12 Carousel Layout


I had lots of fun making this layout especially since I got to finally use my Paisley and Hannah Montana carts. The World's Biggest Carousel in located in Northern California at Great America. I had no idea what to use as a title, so I googled Carousel and it turns out this is the BIGGEST in the World! Suprise to me!

My Highest Viewed Video

 Please come and support my YouTube channel and watch my highest viewed viewed video and subscribe! https://youtube.com/shorts/4gZ1h0N7sP8?f...